We never received so many complaints about connection problems like in these last years. The EA servers never were so overloaded, so it’s normal. Many people are thinking to give up because they can’t play the game at all. If it is your case, don’t do it. Most of the times, there are ways to improve your game connection. We will explain how in our FIFA 17 Connection Problems Troubleshooting Guide.
FIFA 17 Connection Problems
There are many thousands of gamers who have problems connecting to FIFA 17 servers.
Among the most common anomalies are:
- Connection drops too often (including in the end of each match);
- High lag;
- Trouble finding opponents to play against;
- Trouble connecting to FUT 17 even when the EA servers are on.
It is true that the EA servers are far from being great. But, unlike the idea that the community usually has the greatest fault is not from EA. It’s the players. Don’t forget that the connection used on most of the FIFA 17 game modes is P2P (peer to peer).
A poor Internet service provider or a wrong configuration of connection settings are the main reasons for these problems. Many of these situations can be fixed without great difficulty. That’s what we intend to try to help in this article. We are not experts in this area but we also had connections problems and have investigated a lot to find solutions. Today we play without any problem.
We don’t guarantee you that you will be able to play after to follow our tips but at least you can try. In most of the cases, players who follow these tips improve their game experience.
There are several ways to try to improve your FIFA 17 connection.
We will list the 20 most important FIFA 17 connection problems by the order of greater ease of implementation:
- Check the Server Status
Try to log on with another account
Restart your network equipment
Simplify your setup
Improve your wireless signal
Connect by cable
Change the matchmaking options
Maximise your bandwidth
Test your connection speed
Turn on/off UPnP on your network hardware
Try a direct modem connection
Add an exception to your firewall
Close programs running in background
Clear the cache / Delete data
Avoid using IPv6
Assign a Static IP Address
Open the network ports
Optimize your MTU
Get Open NAT Type
Change to another ISP
Check the Server Status
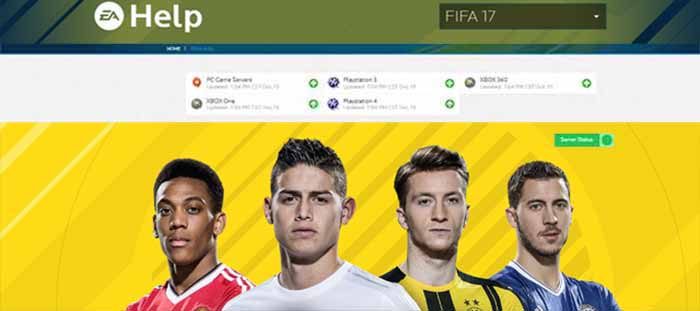
Before anything else, you should be sure that EA servers are running without problems.
It is very easy to check it:
- Click here
- Click on ‘server status‘
- Check if the server of your console is working or not.
You should also check the consoles status.
It is very easy to do it:
- Click here (XBox) or here (Playstation)
- Confirm if the server is ‘normal’ in ‘games’ (XBox) or if ‘games and social networks’ are green (Playstation).
Try to log on with another account
Before spending a good amount of time testing all the steps of this guide, you should be sure that the problem is in your connection and not in your account.
Only if you can not get into your Ultimate Team account or EAS account, create a new one and test it on the same console to see if your first account is corrupted / banned or if the problem is in your connection.
Restart your network equipment
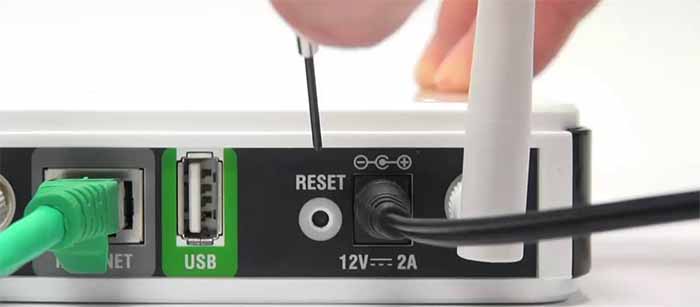
If you only had problems with your FIFA 17 connection right now, so this should be your first step in an attempt to solve them.
Follow the next steps and, in the end, test your connection again:
- Turn off your console and network hardware (for example, your modem and router);
- Wait 30 seconds;
- Turn on your modem and wait for it to come back on line (approximately one minute);
- Turn on the next piece of hardware (for example, the router), and wait another minute;
- Repeat the last step for every additional piece of network hardware.
Ensure your router or modem’s firmware and drivers are up to date. To do so, you’ll likely be able to find help from your router manufacturer’s website.
Simplify your setup
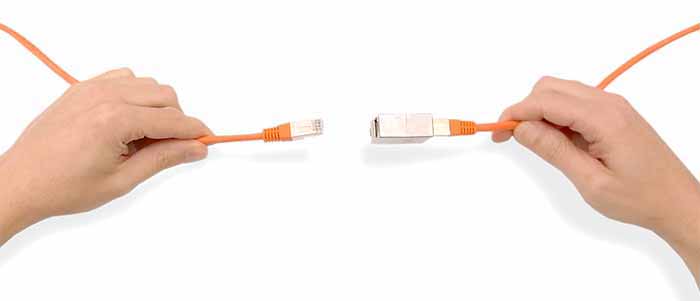
Although it is unlikely that you go and find the solution to your problem in simplifying network configuration, it is important to make it to screen every chance.
Your router or gateway might be having problems sharing an Internet connection. To see whether this is true, try to do one of the following and, at the end, test your connection again:
- Wired connection
Temporarily unplug everything from your router, except the cable to your modem and the cable to your Xbox console or to your Playstation console.
- Wireless connection
Temporarily turn off everything that’s connected to your wireless network except your Xbox console or your Playstation console.
Improve your wireless signal
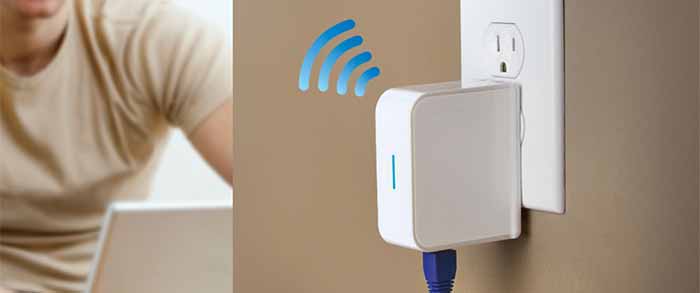
A weak wireless signal can cause poor FIFA 17 performance. Check your wireless signal strength and follow these tips:
Move your router or gateway off the floor and away from walls and metal objects.
Move your console off the floor and away from walls and metal objects. Remove your console from an enclosed entertainment centre, bookshelf or TV stand.
Minimise obstructions along a straight-line path between your console and your wireless router or gateway. Possible obstructions include TVs, cabinets, appliances, other electronics and furniture.
Shorten the distance between your console and your wireless router or gateway. Ideally, your network hardware should be near the centre of your home.
Turn off wireless devices. If your router uses the 2.4 GHz band, try turning off wireless devices, such as 2.4 GHz cordless telephones, Bluetooth devices and baby monitors. If you are using a wireless headset with a base station, try moving the transmitter away from your console, or temporarily turn it off to see if your wireless network signal improves.
Try changing your wireless channel. Wireless routers and gateways can broadcast on different channels, and one channel might be clearer than another. For example, try channel 1 or 11. See your hardware documentation for help with changing wireless channels.
Add a wireless repeater to extend your wireless network range. You can boost your signal strength by placing a wireless repeater halfway between your router or gateway and your console.
Connect by cable
Most of the players use the functionality that allows them to connect the console to the internet via a wireless connection.
It is undoubtedly more practical, but usually wireless connections are also slower. Moreover, wireless connections are also more likely to network conflicts and errors.
Try to connect your console to the router by a good ethernet cable and, if necessary, set up your Internet access on your console.
If you are already use a wired connection, change your ethernet cable.
Change the matchmaking options
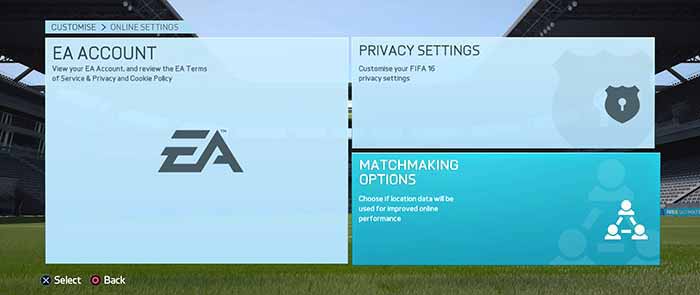
If your biggest problem is to find an opponent to play, then you should try to change the matchmaking options.
Approximate location matchmaking uses your IP address to find an opponent closer to you for online play in Head to Head modes. To change it you just need to start FIFA 17 and follow the path customise – online settings – matchmaking options and choose ‘yes’ to the approximate location matchmaking. The game will try to find opponents near to you.
Maximise your bandwidth

Bandwidth is the amount of information transferred over your Internet connection. If your bandwidth is limited or fluctuates dramatically, it can affect the performance of your FIFA 17 matches.
When someone in your house browses the Internet, they use bandwidth that could be going to your console.
If you are having problems to play FIFA 17, make sure that other computers in your home are not downloading or transferring files while you are trying to play.
Test your connection speed
If you are experiencing connection issues, you may want to test your connection speed. That’s what they will ask you to do if you contact the EA Support. There are several ways to do this using tools available on your computer, or with a powerful program called UOTrace that will provide extra information you can send to an Advisor.
UOTrace gives you the path the packet traveled through, as well as the speed and the percent loss.
Follow the steps below to perform a test using the UOTrace:
- Step 1
Download UOTrace here and run it.
- Step 2
Click the Options menu at the top of the window and select Advanced.
- Step 3
In the window where the server is listed, type in “easo.ea.com”
- Step 4
Click the Traceroute button. After the traceroute has completed, click the Poll button.
- Step 5
Let the program send about 100 packets then click Stop Poll.
Ping test gives you average ping speed results.
Follow the steps below to perform a test using the Ping test:
- Step 1
Click the Start button, then type “CMD” into the search bar.
- Step 2
Right-click on “CMD” or “cmd.exe” under “Programs”, then select “Run as Administrator.”
- Step 3
At the Command Prompt type in “ping” followed by the server address: easo.ea.com.
Hit Enter and wait for the results.
Trace Route gives you the path the packet traveled through, as well as the speed.
Follow the steps below to perform a test using Trace Route:
- Step 1
Click the Start button, then type “CMD” into the search bar.
- Step 2
Right-click on “CMD” or “cmd.exe” under “Programs”, then select “Run as Administrator.”
- Step 3
At the Command Prompt type in “tracert” followed by the server address: easo.ea.com.
Hit Enter and wait for the results.
FIFA 17 uses the TCP/IP protocol that sends data in the form of packets. A ping time is the amount of time it takes for a packet of data to be sent from your computer to a host server. These numbers are a general guideline and the meaning of your ping can change depending on the type, or genre, of game you’re playing, or activity you’re trying to do.
Consistent low-pings affect fast-paced games such as FIFA, but have less of an impact on playing slower-paced games or downloading games.
If you are getting pings that average 75-100ms you’re likely fine. If you have multiple >100ms pings, that can signal connectivity problems in your games.
Host names/servers are the individual computers that make up the Internet. The connection you make to the server may travel, or hop, through 15-25 individual hosts before reaching it. If the hosts are suffering any issues, they can cause poor game performance.
If the ping for a particular host in the first few (3 to 4) hops is significantly high (usually near or above 175ms), it signifies that the routing host is either receiving more traffic than it can effectively handle, or is having some type of technical issue.
If the first few hop shows an IP address reading a mix of 10.x.x.x, 172.16.x.x, or 192.168.x.x, this means your connection is moving through several private networks that could be causing issues with game connectivity–this is usually when you’re on a very open network, such as on a University campus, at a library, on a military base, etc; if this is the case, you likely need to contact your network administrator to try to workaround any issues. Moving through multiple of the same type of private network–meaning that they consistently share the same number pairing in their above-stated prefix–however is usually fine.
If the third hop in particular shows the IP address 0.0.0.0, this probably means your device is having DHCP resolution issues, which you can solve by setting up a static IP address for your gaming device. You can get tutorials on how to setup a static IP address from your ISP, router manufacturer, or other resources online.
In UOTrace, the shield icons next to the host names give a graphical display of quality. Green indicates a good connection; as it worsens, the colors pass through various shades of yellow, red, gray, and finally, black.
Percent Loss is the percentage of packets that are being lost, or information you’re sending that the host is either not receiving or able to return. Generally, if your Percent Loss reads anything other than 0 or 100%, there is a problem,–even a Percent Loss of 1% or 2% is enough to cause issues. These problems can be the result of hardware issues at the host server, connectivity bottle-necking (too many users communicating through that host), telephone line noise, or other factors.
A high ping will cause your client to be unable to communicate fast enough with the server for the game to maintain fluid motion. This will result in your game’s movements appearing jerky, and you will notice that the players around you seem to be able to move much faster than you can. This is due to the fact that the other players are most likely taking a different route to the server and are not affected by the same issue you are.
Turn on/off UPnP on your network hardware
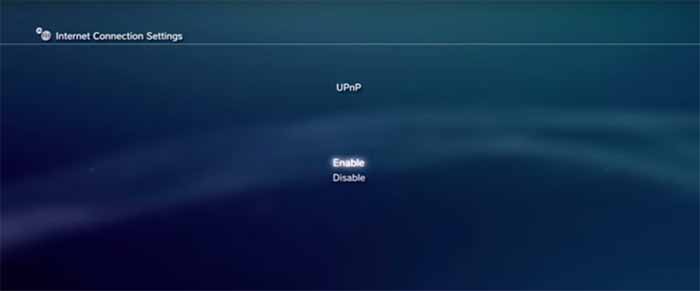
Sometimes when you have multiple devices – such as consoles, computers, tablets and phones – all simultaneously on the same network, especially when trying to connect to a single game server, there’s a chance that one or more players will be disconnected from the server. This can usually be solved by activating UPnP on your router, as well as making sure that all devices on the network both have UPnP support, and that it is set to active. Universal Plug and Play (UPnP) is a standard that helps routers communicate effectively.
If your router or gateway supports UPnP, make sure this setting is turned on.
Follow the steps below to turn on UPnP on your network hardware:
- Step 1
Login to your router administration page.
- Step 2
Look for “UPnP”, usually found under advanced settings.
- Step 3
Turn on all UPnP functionality.
- Step 4
Reboot your console and restart FIFA 17.
Some players are experiencing intermittent connectivity or lag in game play and one of the workarounds is to turn off the UPnP.
Follow the steps below to turn off UPnP on your network hardware:
- Step 1
Login to your router administration page.
- Step 2
Look for “UPnP”, usually found under advanced settings.
- Step 3
Turn off all UPnP functionality.
- Step 4
Reboot your console and restart FIFA 17.
If you are experiencing connection problems when playing FIFA 17, check if UPnP is active or not and test turning on / off.
Try a direct modem connection
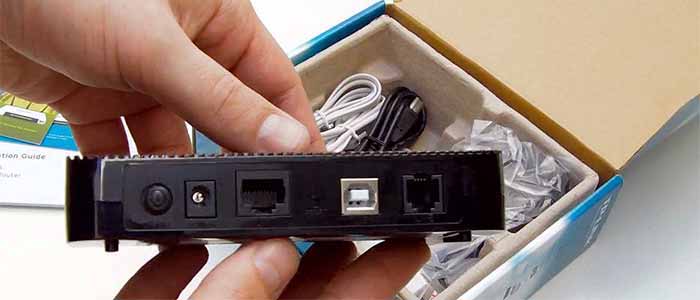
If your console is connected to the Internet through a router or bridge, try connecting the console directly to the modem, instead of through those devices.
To do that, plug one end of a network cable into the back of the console and the other end directly into your modem.
If performance improves, the problem is with your router or bridge. In that case, change it for new ones or study the chance to connect your console direct to your modem.
Add FIFA 17 as an exception to your firewall
This step is for PC players only. If you play FIFA 17 on a PC, add the game as an exception to your firewall or, if you’re unworried about security, disable your firewall altogether.
Follow the steps below to add FIFA 17 to the exceptions list of your Windows firewall:
- Step 1
Search for “firewall” in the Windows 8 / 10 Start menu and select it from the options that appear in the top left.
- Step 2
Click on “allow an app or feature through Windows firewall” in the Windows Firewall window.
- Step 3
Click “Change settings” in the next window. Click “Allow another app…” in the bottom right corner.
- Step 4
Select FIFA 17 and then click “Add” to add the exception to the list.
Close programs running in background

This is another step for PC players only.
While having many applications running simultaneously might simply slow your computer down a bit, resulting in maybe a chugging framerate or laggy gameplay, certain applications can even lead to more serious issues, such as limited connectivity and game crashes. If you are experiencing any issues, we recommend closing any and all background applications that you can before even launching Origin to guarantee the best game play performance and stability possible.
If a program is potentially causing interference with either your games or with Origin, you can either simply close or disable them, or, especially in the case of security applications, can add Origin and your individual games as exceptions–frequently referred to as “safe,” or “allowed”–so that their processes are overlooked by your program or programs.
The following applications and types of programs have been reported to cause issues with Origin and playing FIFA 17:
- Anti-Virus and Anti-Spyware Applications
Any Anti-Virus program could potentially block Origin and Origin game access, especially when not properly configured for use with Origin. Make sure that Origin and FIFA 17 are listed as exceptions for these programs so that they may run freely. If issues persists, try disabling, or even temporarily uninstalling the program, to test the issue.
- FTP and other Web Server Programs
Much like Peer to Peer software, FTP or other Web Server programs can eat up a lot of your internet bandwidth, dramatically affecting your online play, or even take up a lot of your system’s resources, resulting in slowed-down or laggy gameplay. Make sure you’ve exited any FTP or similar programs before playing, or minimally ensure that no downloads or uploads are active.
- Download Management Applications
Download Management programs, the most-common of which are “download accelerators,” may affect your FIFA 17 downloads or updates. Before trying to open Origin, which itself may require an update or automatically start downloading game updates, make sure to close out your Download Management software.
- VPN Applications
Virtual Private Networks allow users access to secure, private networks, such as a business intranet, across public networks, such as the internet. VPNs take up some extra internet connection bandwidth as well as computer processing power, both of which may affect the performance and responsiveness of your games, while some private networks may have additional security measures that will also limit game playability. Make sure to disconnect from any VPN you may be connected to before starting up your game.
- Proxy, IP Filtering and IP Masking Programs
Using a proxy, or additionally using any sort of IP filtering or IP masking software, can affect how your computer and your games are connecting to Origin and EA’s game servers. Disable any Proxies, IP filtering, or IP masking before jumping into the Origin client or your games. Note, the use of proxy server is not supported by the Origin client.
Clear the cache / Delete data
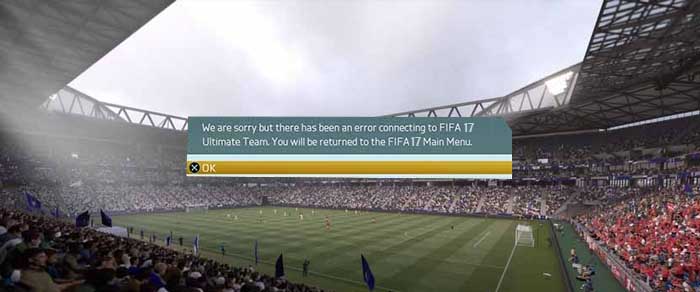
Several troubleshooting tips for game freezes, slow or unsuccessful game loads and other issues recommend deleting game data on a PlayStation or clearing cache on an Xbox One. Follow the steps below depending on the console.
- Playstation 3 / Playstation 4
1) Open the Settings menu at the top of the dashboard.
2) Select Application Saved Data Management.
3) Select Saved Data in System Storage in the Application Saved Data Management menu.
4) Select Delete.
5) Choose a game to access the game’s saved data.
6) Select items from the list of games to delete. Open the Options menu to sort or to view more information about a file
- XBox One
1) Press and hold the power button on the front of the console until it powers down completely.
2) Unplug the power cable from the back of the console so that the power brick in not connected to the console.
3) Press the power button on the console three or four times. This will ensure that any remaining power in the battery is drained, clearing the cache on the console.
4) Plug the power cable back into the console and wait for the light on the power brick to change from white to orange.
5) Turn on the console using the power button.
- XBox 360
1) Press the Guide button on your controller, go to Settings, and select System Settings.
2) Select Storage or Memory.
3) Highlight any storage device, and then press Y on your controller.
4) Select Clear System Cache.
5) When prompted to confirm storage device maintenance, select Yes.
Regular internet usage causes your computer to automatically cache IP addresses and other domain name system results. Clearing this cache will refresh the data, getting rid of outdated data that may be causing connection issues.
Follow the steps below to flush DNS Cache:
- PC
1) Navigate to the desktop. Hold down the Windows key and press R. (This will open the Run dialogue)
2) Type ‘CMD’ and press Enter. (This will open a command prompt)
3) Type ‘ipconfig /flushdns’ and press ‘Enter’.
4) Type ‘ipconfig /registerdns’ and press ‘Enter’
5) Type ‘ipconfig /release’ and press ‘Enter’.
6) Type ‘ipconfig /renew’ and press ‘Enter’.
7) Type ‘netsh winsock reset’ and press ‘Enter’.
8) Reboot the computer.
Avoid using IPv6
FIFA 17 uses a peer-to-peer connection, or a connection shared between you and one or more other players, for on line game play and matchmaking. Players with their routers set to use Internet Protocol version 6 (IPv6) for their connections tend to have compatibility issues with players using the more common IPv4. For instance, if one player is on an already-poor IPv6 connection then all players are usually disconnected.
PC players can change their system’s Internet Protocol version by:
- Step 1
On your PC, open the Control Panel and then search for adapter. In your search results under Network and Sharing Center, click View network Connections.
- Step 2
Right-click your active network connection and select Properties.
- Step 3
In Properties you should see check boxes for both Internet Protocol version 4 (TCP/IPv4) and Internet Protocol version 6 (TCP/IPv6).
If you’ve been having frequent connectivity problems and IPv6 is checked, uncheck it.
If you’ve been having frequent connectivity problems and IPv4 isn’t checked, check it.
If you experience new connectivity issues following the disabling of IPv6 on your PC, re-enable it to get rid of your new issues.
Assign a Static IP Address
Assigning a permanent IP address to your console ensures that it always has the same internal IP address even after it is rebooted. A static IP address will ensure that your router always knows where it can find your console. Some routers allow you to manually assign an IP address, so you should check to see if that is an option in your router. If your router does not allow manual assignments, you can set up a static IP address in your console.
The guidelines to setting up a static IP address on your console are too long to be published in this guide. For that reason, we ask you to follow the links below depending on your platform:
After you assign a static IP address on your console, you need to set the console to DMZ (1). De-Militarized Zone is a place that is unprotected by any firewall/router from an attack. To do it, follow these steps:
- Step 1
Open your PC and start your internet browser.
- Step 2
In the Address bar, type the default IP address for your router or gateway, and then press ENTER.
If you don’t know how to access your router administrator page, hold down the Windows key and press R, then type ‘CMD’, hit Enter, type ‘ipconfig /all’ in the command window and hit Enter again. It will show you something like 192.168.1.254 or similar.
- Step 3
Somewhere in your router’s settings there is an option to assign a ‘DMZ’. Find it and put in the IP address the one you gave to your console earlier.
- Step 4
Save your settings and reboot both your router and the console before testing the connection again.
(1)
A computer on the DMZ is susceptible to any hack attempt and will rely on firewall and anti-virus to protect you.
It is OK for consoles but it is generally unwise to use this method for a computer
METHOD 17
Open the network ports
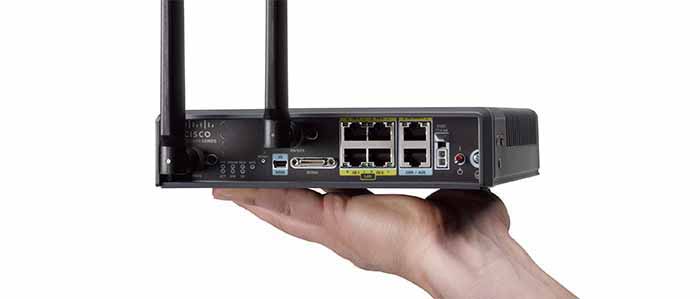
For players having difficulties connecting to on line play or to other players, it is likely that they need to open, or forward, their on line ports.
Ports are basically ‘endpoints’ between two connections. A ‘Port number’ is assigned to each end, like an address, in order to direct the flow of Internet traffic.
If you are experiencing connectivity issues with FIFA 17 on your console, and you have exhausted all basic connection troubleshooting we have described, you may need to follow these instructions to learn how to open the router or gateway ports:
- Step 1
Open your PC and start your internet browser.
- Step 2
In the Address bar, type the default IP address for your router or gateway, and then press ENTER. If you don’t know the default IP, try to find it on your documentation or on hardware manufacturer’s website. The most common are Belkin (192.168.2.1), Linksys (192.168.1.1), D-Link (192.168.0.1) and Netgear (192.168.0.1. or 192.168.1.1). If you still don’t know how to access your router administrator page, Hold down the Windows key and press R, then type ‘CMD’, hit Enter, type ‘ipconfig /all’ in the command window and hit Enter again. It will show you something like 192.168.1.254 or similar.
- Step 3
Type your user name and password (for your router or gateway), and then click OK. If you do not know the default user name and password, refer to your hardware manufacturer’s documentation.
- Step 4
Once you are logged in, you should see your router or gateway’s configuration page.
Follow the tips of PortFoward about how to open the ports of your particular model. It is impossible to show here because there are hundreds of different models with different procedures.
- Step 5
Depending of your platform, insert the following ports on your Port Range Forward page:
- PC
UDP: 659, 9565, 9570, 9000 – 9999
TCP: 3569, 9946, 9988, 10000 – 20000, 42124
- Xbox One
UDP: 53, 88, 500, 3074, 3544, 3659, 4500
TCP: 53, 80, 3074, 3659
- Xbox 360
UDP: 53, 88, 3074, 3659
TCP: 53, 80, 3074, 3659
- PlayStation 4
UDP: 3074, 3478-3479, 3659, 6000
TCP: 80, 443, 1935, 3478-3480, 3659, 10000-10099, 42127
- PlayStation 3
UDP: 3074, 3478-3479, 3658-3659, 5223, 6000
TCP: 80, 443, 3659, 5223, 10000-10099, 42127
If your router is new, you may not have to do this process. Check if it supports Pre-Configured on line gaming port settings, select the Xbox Live/Playstation Network Pre-Configured setting and assign it to your console.
If you are experiencing connectivity issues with FIFA 17 on your PC, you may need to follow these instructions to learn how to open the router or gateway ports:
- Step 1
On Windows 7, open up your desktop Start menu then click on the ‘Control Panel’ option to open it. On Windows 8 / 10, hit Windows key + X and then click on the ‘Control Panel’ to open it.
- Step 2
In the search box type ‘firewall’. Click on the ‘Windows Firewall’ option that appears and then in ‘Advanced Settings’.
- Step 3
If you are prompted for an administrator password or confirmation, type the password for confirmation. If not, please skip to the next step. In the left pane of the ‘Windows Firewall with Advanced Security’ dialog box click ‘Inbound Rules’
- Step 4
In the right pane, click ‘New Rule’. This will cause a New Inbound Rule Wizard to run where you will be able to enter the following ports:
- PC
UDP: 3659, 9565, 9570, 9000 – 9999
TCP: 3569, 9946, 9988, 10000 – 20000, 42124
Optimize your MTU
The maximum transmission unit of a communications protocol of a layer is the size of the largest protocol data unit that the layer can pass onwards. An MTU limit that is set too high can cause fragmented packets and packet loss on your connection.
The first thing to do is to find your optimal MTU. Then, you just need to set that value on your console’s settings. Follow these instructions to learn how to do it:
- Step 1
Open your PC and navigate to the desktop. Hold down the Windows key and press R (this will open the Run dialogue)
- Step 2
Type ‘CMD’ and press Enter (this will open a command prompt)
- Step 3
Type ‘www.google.com -f -l 1500’. You should see a message saying ‘100% packet loss’.
- Step 4
Now, you want to lower the last value by 10-15 or so, keep lowering it until your packets are no longer fragmented and 100% are received. Finally, you will want to increase the last value, little by little, until your packets begin to fragment again. ex: 1421, 1422, 1423, etc. Add 28 to your final value and take note of your optimum MTU value
- Step 5
Go to the settings menu on your console and then setting up a new internet connection, or edit an existing one. Change the option from automatic to custom, and then set the MTU to your Optimum MTU Value.
Get Open NAT Type
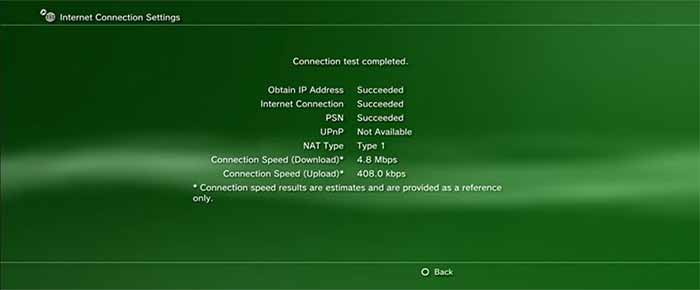
Maybe the most important and overlooked piece of a quality connection is your NAT type.
Network address translation (NAT) is the process of modifying IP address information in IP packet headers while in transit across a traffic routing device. On NAT type 1 NAT type 1 is usually static IP addressing with PAT (Port Address Translation) and the modem connects directly to your console. NAT type 2 is Dynamic IP addressing with PAT and a router is used to connect the modem to your console.
Your NAT Type is either Open, Moderate or Strict, and controls what other Nat Types you can connect to.
An Open NAT Type means you can pretty much connect to anyone but is the least common of the three to have.
A Moderate NAT Type, the most common of the three, means you can only connect to others who are Open or also Moderate.
A Strict NAT Type means you will only be able to connect to others who are Open.
As you can probably figure out, if you have a Strict NAT Type, you’re probably going to have a bad time, at least when trying to play games online with your friends.
To top it all off, sometimes it’s pretty hard for your games to figure out your type and will connect you incorrectly, sometimes your ISP has a separate NAT Type, and sometimes EA servers or your connection might just be down.
If you got here without fixing your problem, don’t worry: there are good chances to have success with this tip if your router supports DMZ. We leave this tip to the end because it has a major drawback: you will be unable to use the Internet at home while playing FIFA 17. But at least, you will play perfectly.
A modem that has a router built in is always a solution to avoid. That’s why you should try to get NAT type 1. It will avoid many router problems, as the ones that happens when it does not save the open ports changes.
To learn how to configure a NAT type 1 connection on your XBox follow these steps:
- Step 1
1) Open your PC and dtart your internet browser.
2) In the Address bar, type the default IP address for your router or gateway, and then press ENTER. If you don’t know the default IP, try to find it on your documentation or on hardware manufacturer’s website.
3) Type your user name and password (for your router or gateway), and then click OK. If you do not know the default user name and password, refer to your hardware manufacturer’s documentation or ask to your ISP.
4) Disconnect the Internet through a path that depends of your router model but should be similar to Broadband Connection -> Internet Services -> Disconnect.
- Step 2
1) On your console, go to My Xbox, and then select System Settings.
2) Select Network Settings.
3) Select WiredNetwork or the name of your wireless network, if you are prompted to do so.
4) Select Configure Network and on the Additional Settings tab, select PPPoE Settings.
5) Select User Name, enter it and select Done.
6) Enter your password and service name. If you don’t know your user name, password or service name (PPPoE settings), please contact your Internet service provider (ISP).
7) Press the B button on your controller, and then test your connection.
- Step 3
Every time you turn on the console, you must turn off the Internet in router (step 1). Only then the console will be able to connect to the Internet.
Every time you disconnect the console, you must connect the Internet back in the router in order to have it on other devices.
To learn how to configure a NAT type 1 connection on your Playstation follow these steps:
- Step 1
1) Open your PC and dtart your internet browser.
2) In the Address bar, type the default IP address for your router or gateway, and then press ENTER. If you don’t know the default IP, try to find it on your documentation or on hardware manufacturer’s website.
3) Type your user name and password (for your router or gateway), and then click OK. If you do not know the default user name and password, refer to your hardware manufacturer’s documentation or ask to your ISP.
4) Disconnect the Internet through a path that depends of your router model but should be similar to Broadband Connection -> Internet Services -> Disconnect.
- Step 2
1) On your console, go to Network Settings -> Internet Connection Settings.
2) Choose Custom -> Wireless -> Enter your WLAN settings -> Insert your WLAN key (if connected wirelessly)
or Choose Custom -> Network Cable -> Auto Detect (if connected by cable).
3) Choose PPPoE and enter your username and password (PPPoE settings). If you don’t know your user name, password or service name (PPPoE settings), please contact your Internet service provider (ISP).
4) Follow the path Auto DNS -> Automatic MTU -> Do not use proxy -> Disable UPNP
5) Save and test your connection.
- Step 3
Every time you turn on the console, you must turn off the Internet in router (step 1). Only then the console will be able to connect to the Internet.
Every time you disconnect the console, you must connect the Internet back in the router in order to have it on other devices.
Change to another ISP

If none of the previous nine tips have helped you, please contact your Internet Service Provider. Expose the problem and ask for help. Request a firmware update for your router or a switch to other equipment.
If the problem persists, consider changing to another ISP. Before you do, try to talk to other players and analyse the feedback that they give you about other ISPs.
It is not the perfect solution but, if playing FIFA 17 is really important to you, it may be the only one.
If you have no luck following this FIFA 17 Connection Problems Troubleshooting Guide, contact EA Support.
